CodeWorld – Multi-Vendor MarketplaceCodeWorld – Multi-Vendor Marketplace
Build and launch your own digital products marketplace with CodeWorld, powered by Next.js, Tailwind CSS & Supabase.CodeWorld – Multi-Vendor Marketplace
Build and launch your own digital products marketplace with CodeWorld, powered by Next.js, Tailwi...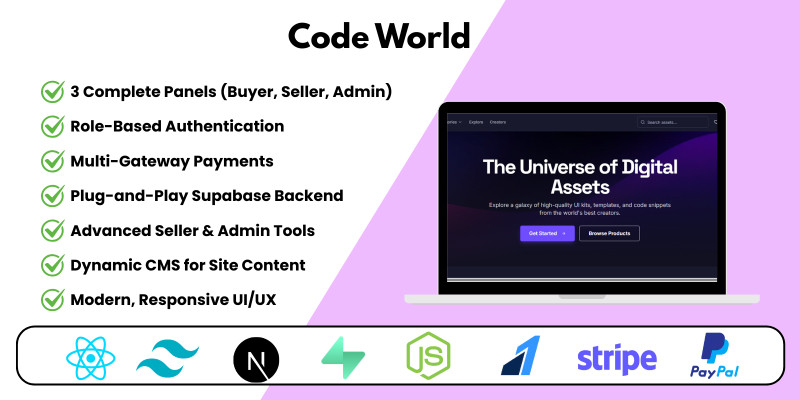
Screenshots


Overview
Code World - Digital Marketplace
Stop dreaming, start earning. Code World is a complete, production-ready script that allows you to launch your very own multi-vendor digital products marketplace. Built with Next.js, Tailwind CSS, and Supabase, it includes powerful Buyer, Seller, and Admin panels with everything you need to scale.
Features
Complete Feature Breakdown
👤 Buyer Panel: Storefront, advanced search & filtering, product pages with reviews, multi-gateway checkout (Stripe, PayPal, Razorpay), buyer dashboard, and support system.
Here is login Details for buyer:- [email protected] | buyer123
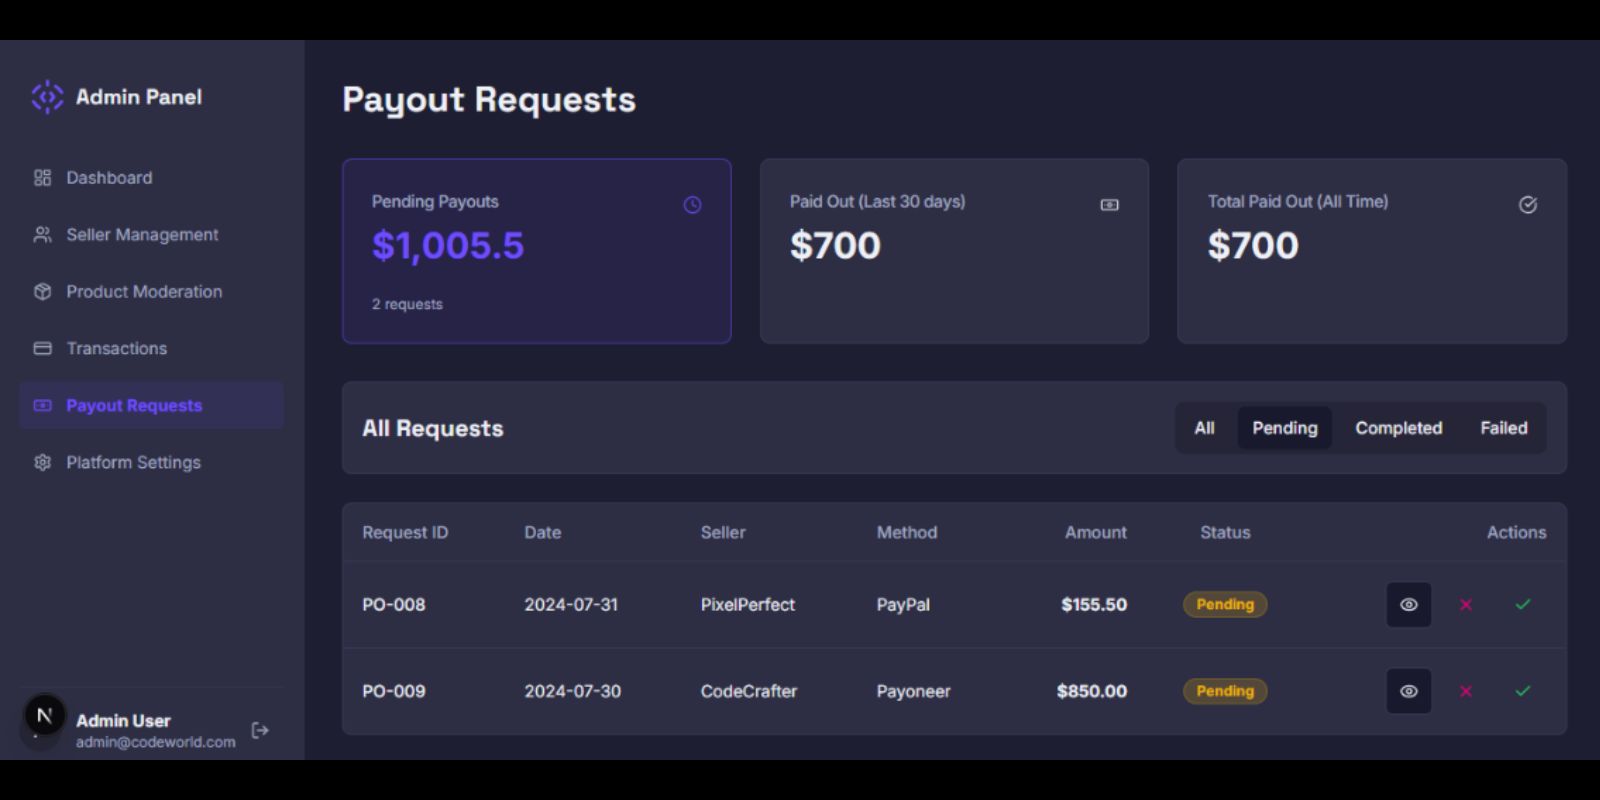
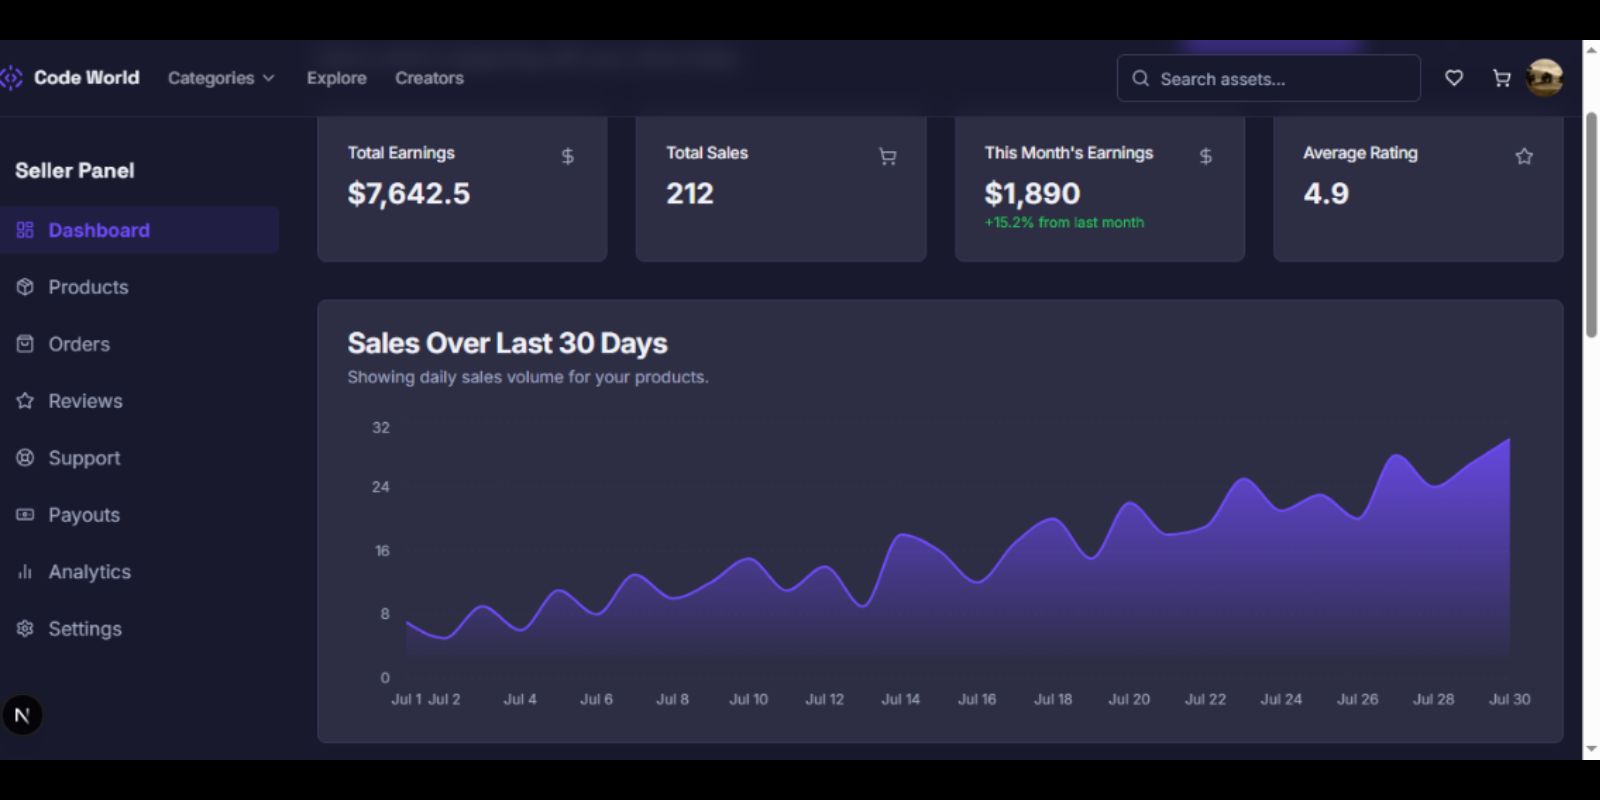
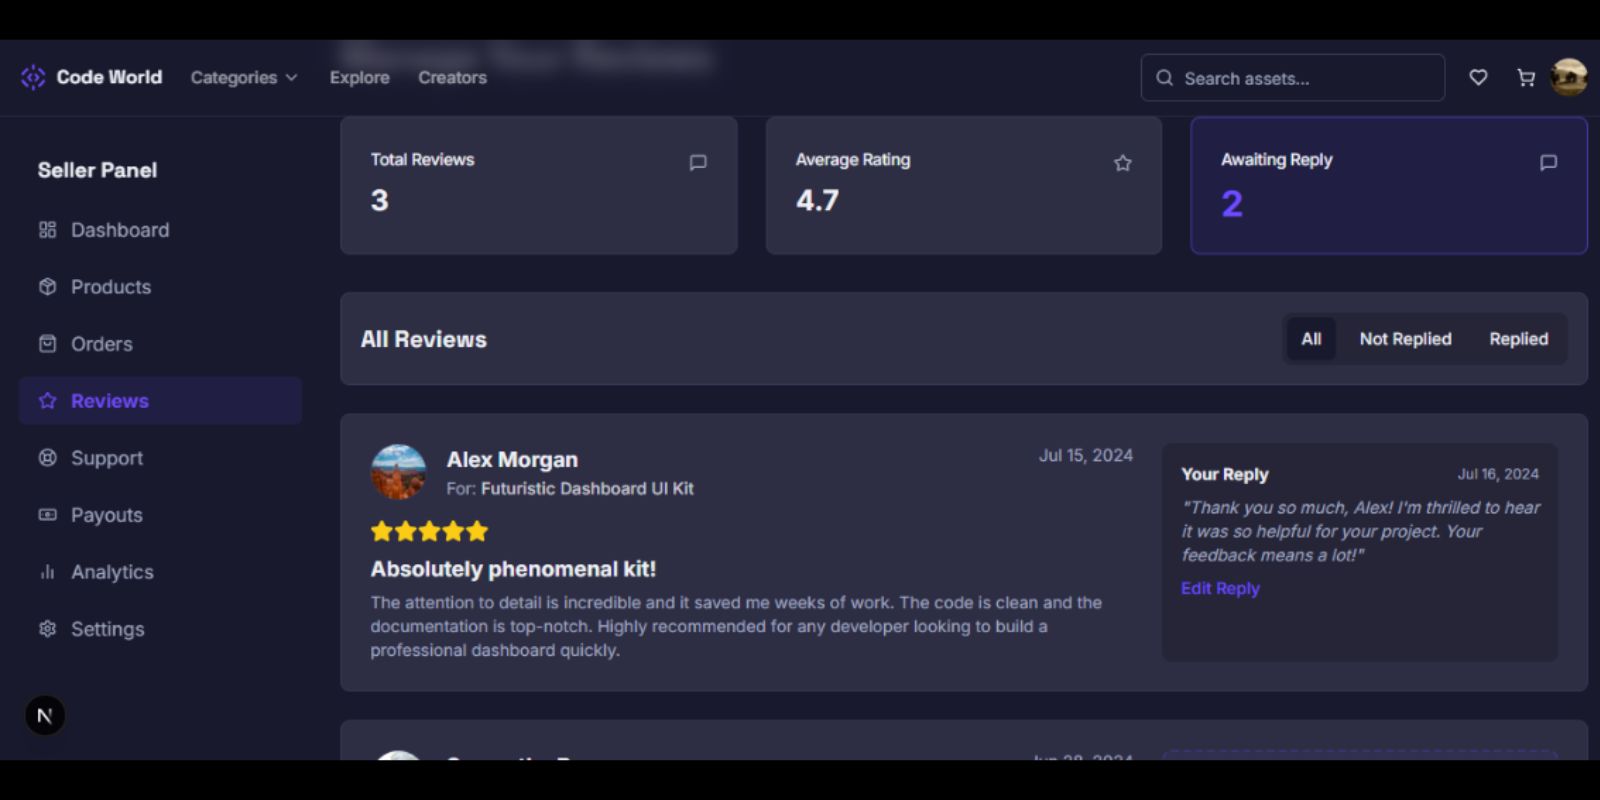
💼 Seller Panel: Onboarding flow, seller dashboard with analytics, product & order management, payouts page, and communication hub.
Here is login Details for seller:- [email protected] | seller123
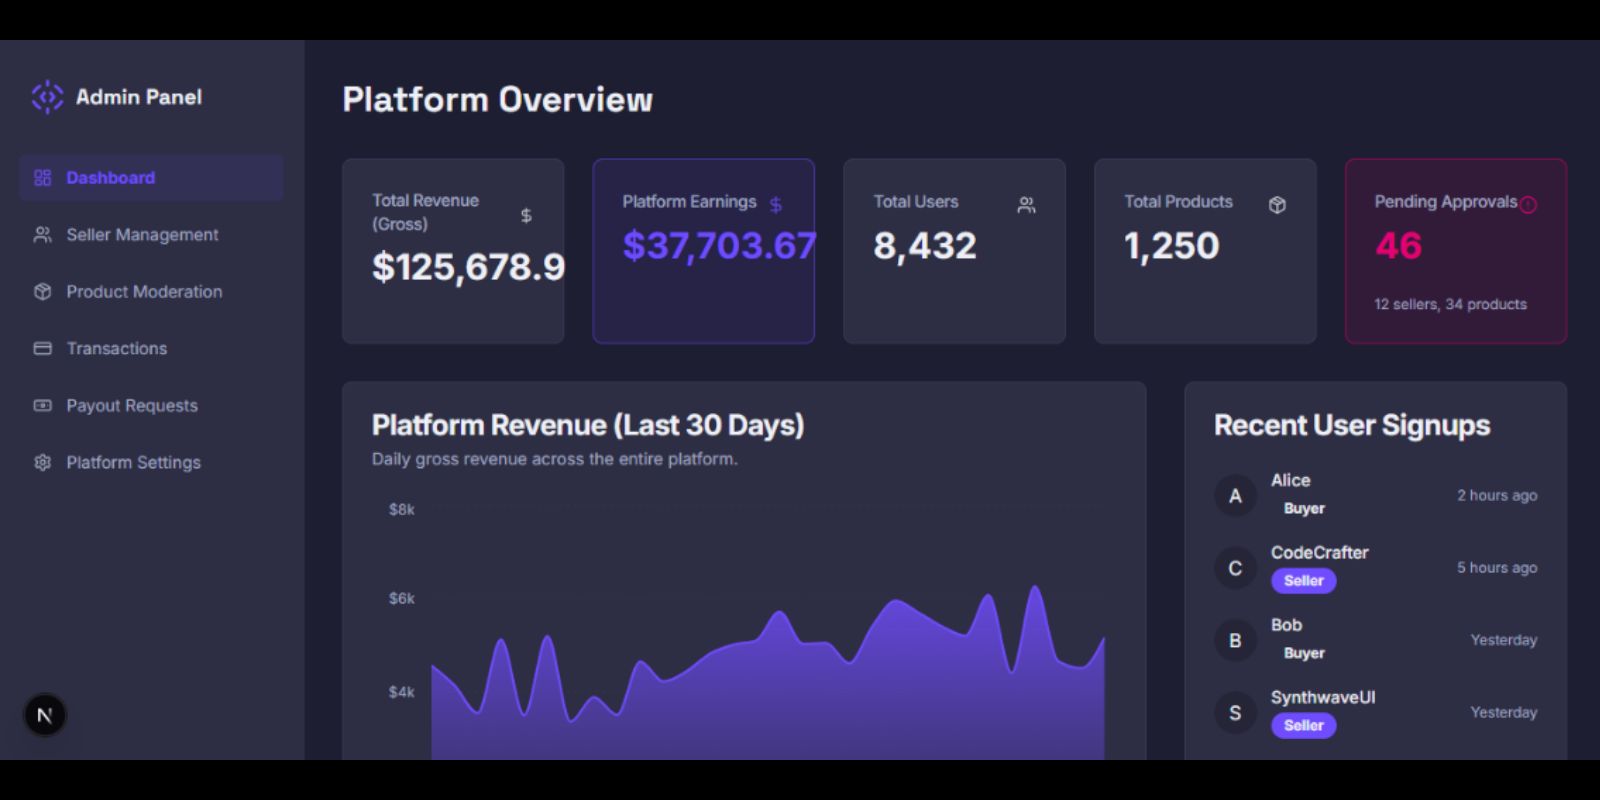
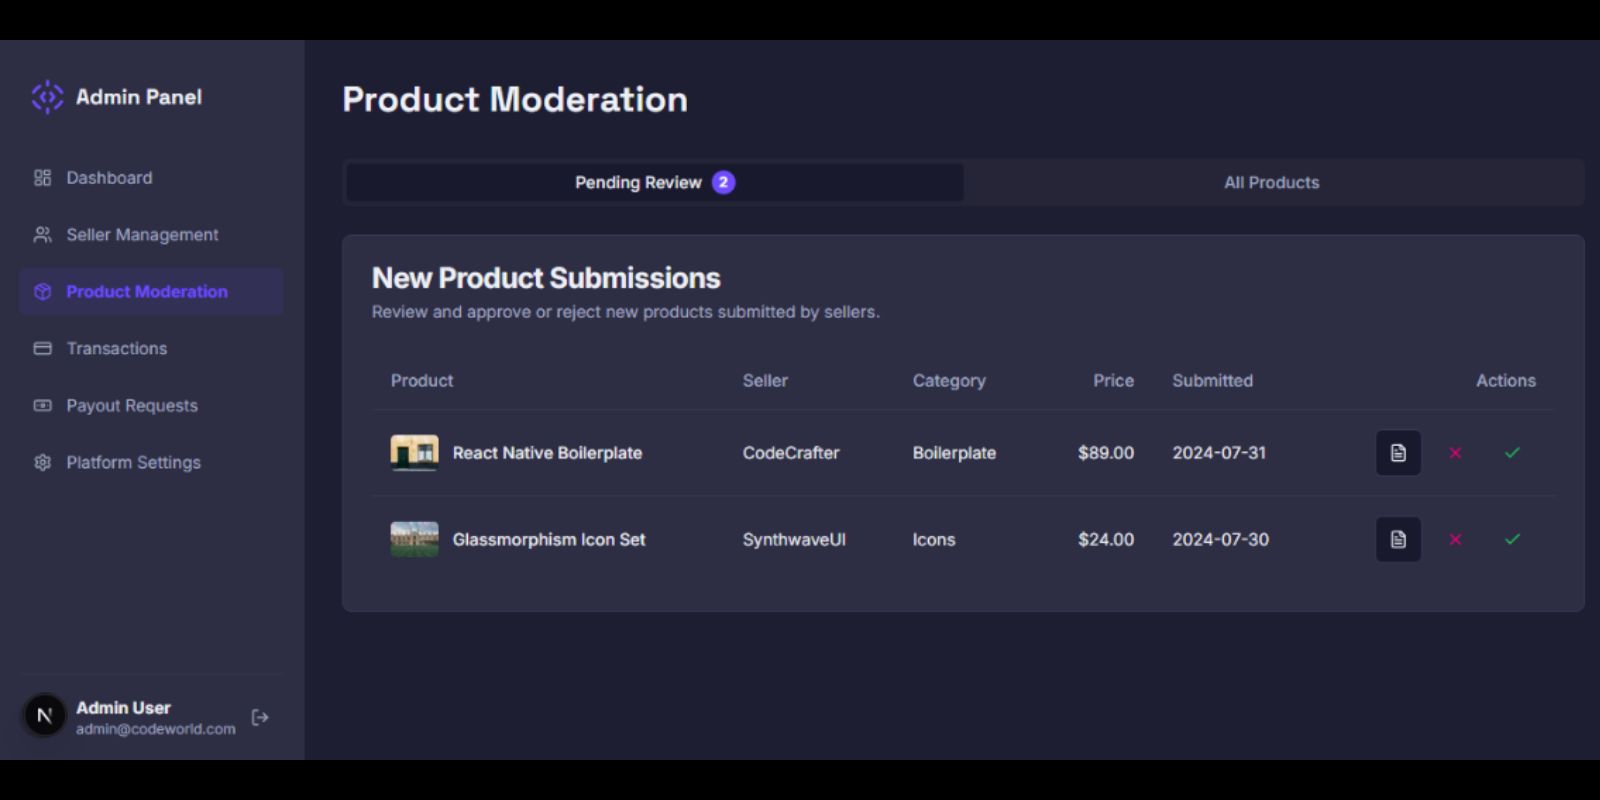
⚙️ Admin Panel: Full control with dashboards, seller management, product moderation, transaction tracking, and dynamic CMS tools.
Here is login Details for admin:- [email protected] | admin123
Requirements
Requirements & Tech Stack
- Framework: Next.js 14+ (App Router)
- Styling: Tailwind CSS
- Backend: Supabase (Auth, PostgreSQL, Storage, Edge Functions)
- Payments: Stripe, PayPal, Razorpay
- Extras: react-hot-toast, recharts
Instructions
Installation Guide
You're just a few steps away from launching your own digital marketplace. Follow this guide carefully.
Step 1: Get Code & Install Dependencies
First, unzip the downloaded file and navigate into the project directory using your terminal. Then, run the following command to install all the necessary packages:
<code>npm install</code>
Step 2: Set Up Your Supabase Backend
This script uses Supabase for the database, authentication, and storage.
- Go to supabase.com and create a new project.
- In your new project, navigate to the SQL Editor.
- Open the
DATABASE_SCHEMA.sqlfile that came with this project. - Copy the entire content of the SQL file, paste it into the Supabase SQL Editor, and click "Run". This will create all the required tables and security policies.
Step 3: Configure Environment Variables
This is the most important step. In the project's root folder, rename the .env.local.example file to .env.local. Then, open it and fill in your own API keys.
<code># Get these from your Supabase Project Settings > API
NEXT_PUBLIC_SUPABASE_URL="YOUR_SUPABASE_URL_HERE"
NEXT_PUBLIC_SUPABASE_ANON_KEY="YOUR_SUPABASE_ANON_KEY_HERE"

# Get these from your Stripe, PayPal, and Razorpay Dashboards
NEXT_PUBLIC_STRIPE_PUBLISHABLE_KEY="pk_test_..."
STRIPE_SECRET_KEY="sk_test_..."
# ...and so on for other payment gateways
</code>
Step 4: Run Your Marketplace!
You're all set! Run the following command in your terminal to start the development server:
<code>npm run dev</code>
Your site will be available at http://localhost:3000.
You're All Set!
If you have any issues, please refer to the documentation or contact our support.
Other items by this author
|
PHP Script Installation Service
Don't worry about the installation of your script! Have your PHP Script installed for you.
|
$39 | Buy now |
| Category | Scripts & Code / PHP Scripts / Marketplace |
| First release | 26 September 2025 |
| Last update | 26 September 2025 |
| Files included | .css, .html, .sql, Javascript .js |
| Tags | marketplace, cms, admin panel, ecommerce script, paypal, Stripe, digital products, react, dark theme, nextjs, multi vendor, tailwind css, supabase, seller dashboard, themeforest clone |