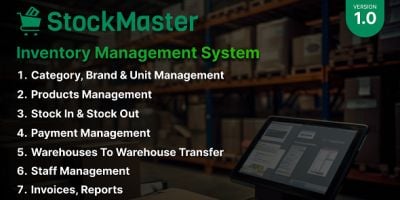
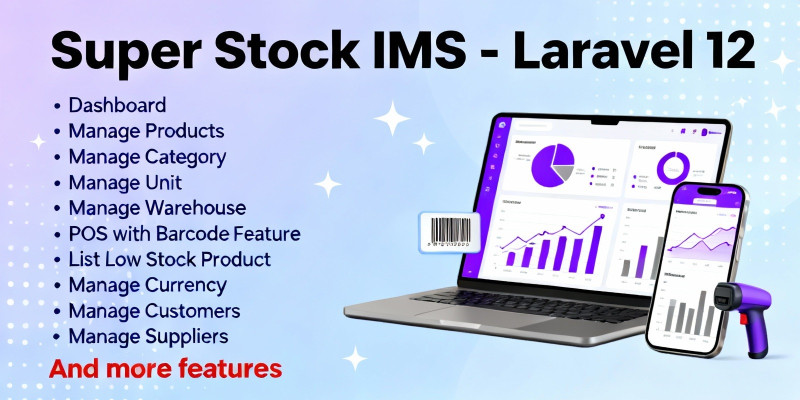
Super Stock IMSSuper Stock IMS
A powerful Inventory Management System (IMS) with POS, barcode scan and multiple warehouse built with Laravel 12. Average rating of 5.0 based on 1 votes
Super Stock IMS
A powerful Inventory Management System (IMS) with POS, barcode scan and multiple warehouse built...
Average rating of 5.0
Screenshots


Overview
Welcome to the Super Stock IMS
I. Introduction
Thank you for choosing the Super Stock IMS, the Inventory Management System (IMS).
This software is a powerful, web-based solution designed to help businesses efficiently track stock levels, manage purchases, streamline sales, and gain real-time visibility into their supply chain. Whether you manage one warehouse or multiple locations, our IMS provides the tools you need to minimize stock-outs, reduce waste, and improve overall profitability.
II. System Overview and Key Features
The Super Stock IMS provides a centralized platform for all your inventory needs, offering the following core capabilities:
· Real-Time Stock Tracking: Monitor inventory levels across multiple Warehouses and Locations instantly.
· Purchase Order (PO) Management: Create, send, and track Purchase Orders to suppliers, and process Goods Receipts to update stock.
· Sales and Invoicing: Generate Sales Orders and professional Invoices, automatically deducting stock upon shipment.
· Supplier and Customer Databases: Maintain detailed records for all your business partners.
· Reporting and Analytics: Generate essential reports like Low Stock Alerts, Stock Value Reports, and Sales History to inform business decisions.
· User Role Access: Secure your data by assigning specific permissions and Roles to different users (Admin, Manager, Stock Clerk, etc.).
· Analytical Charts: Visual comparison of Sales volume against Purchase volume and Sales Return volume against Purchase Return volume over time.
· Multi-Language Support: Super Stock IMS includes built-in multi-language support, allowing you to translate the entire system interface into any language. Users can switch languages instantly, making the system accessible for teams from different regions.
· Multi-Currency Support: ###/bb###
· Quotations: Create and manage professional quotations for customers with itemized products, pricing, taxes, and validity. Easily convert approved quotations into sales with one click.
· Stock Adjustment: Quickly adjust product quantities to correct mismatches due to damage, loss, or manual corrections. Every change is logged for accurate inventory tracking.
· Stock Transfer: Transfer stock seamlessly between warehouses or store locations. Track source, destination, and quantity to maintain perfect inventory accuracy across branches.
· POS (Point of Sale): A fast and user-friendly POS system for quick billing. It supports barcode scanning, multiple payment methods, real-time stock deduction, and printable receipts.
III. System Requirements
1. Server-Side Software Requirements
The application relies on a modern, stable PHP environment and a robust database system.
· PHP Version: PHP 8.2 or higher
The application requires PHP version 8.2 or a more recent release. This ensures compatibility with modern coding standards, security enhancements, and the latest features of the underlying framework (Laravel). Running on an older version will result in errors and potential security vulnerabilities.
· Database: MySQL 5.7 or MariaDB 10.2+
A relational database management system is required to store all application data (products, sales, user accounts, etc.). The system supports either MySQL (version 5.7 or later) or its popular fork, MariaDB (version 10.2 or later). The chosen database must be accessible by the application using the credentials provided during the installation process.
· Web Server: Apache / Nginx server with mod_rewrite enabled
The application requires a standard web server like Apache or Nginx to handle HTTP requests. Crucially, the server must have the mod_rewrite module (or equivalent URL rewriting functionality) enabled. This allows the application to handle clean, human-readable URLs (e.g., /dashboard instead of /index.php?route=dashboard), which is standard practice for modern frameworks.
2. Development Tool Requirements (for Installation)
These tools are essential for the setup process and package management.
· Composer: Composer 2.5 or higher
Composer is the dependency manager for PHP. It is required during installation to download and manage all the necessary third-party libraries and framework components that the application relies on. The version specified (2.5+) ensures compatibility with the installation commands.
3. Required PHP Extensions
The application requires specific PHP extensions to be installed and enabled on the web server to handle various cryptographic, string, and data functions:
· OpenSSL: Essential for strong cryptographic functions, including securing user passwords and handling secure connections (HTTPS).
· PDO (PHP Data Objects): Provides a lightweight, consistent interface for the application to communicate with the database (MySQL or MariaDB).
· Mbstring: Used for handling multi-byte strings, which ensures proper encoding and manipulation of international text characters.
· Tokenizer: Used for internal framework operations, such as inspecting and parsing PHP code.
· XML: Required for various data manipulation and serialization tasks.
· Ctype: Used for character-type testing, optimizing functions related to character handling.
· JSON: Essential for reading and writing data in the JavaScript Object Notation (JSON) format, which is heavily used for data transfer (API calls) within web applications.
· BCMath: Provides support for arbitrary-precision mathematics, necessary for accurate handling of large numbers and complex financial calculations (crucial for an IMS).
· Fileinfo: Used to determine the content type and encoding of uploaded files, enhancing security and file validation.
4. Knowledge Prerequisite
Basic Laravel installation knowledge
While a detailed guide is provided, a basic understanding of the Laravel framework installation process, command-line operations (SSH), file permissions (chmod), and standard web server architecture will significantly aid in troubleshooting and ensure a smoother deployment.
IV. Installation Guide
1. Unzip the downloaded package.
The downloaded software is compressed, typically in a ZIP or similar archive file, to reduce its size and group all necessary files together for easy transfer. This first step requires using a decompression utility (like WinRAR, 7-Zip, or the operating system's built-in tool) to extract the contents into a working directory on your local machine.
i) Select the downloaded file.
ii) Right click on it, a dropdown will be appeared.
iii) Select “Extract” option in the dropdown list.
iv) The file will be extracted.
2. Rename .env.example to .env
Modern web applications use .env (environment) files to store configuration variables that change based on the environment (local machine, staging server, production server). The provided file, .env.example, is a template. Renaming it to .env tells the application to load these crucial, environment-specific settings, such as database credentials and application keys.
i) Select “.env.example” file.
ii) Right click on the file, a drop down will be displayed.
iii) Select the “Rename” option.
iv) Change the file name as “.env”
3. Open the .env file and update your database credentials:
This is a mandatory configuration step to connect the application to its required database. You must open the newly created .env file and replace the placeholder values with the actual connection details for the database you have created on your hosting server:
- DB_DATABASE: The name of your SQL database (e.g., ims_db).
- DB_USERNAME: The username authorized to access this database.
- DB_PASSWORD: The password for that database user.
i) Open the .env file
ii) Update your database credentials
4. Open terminal and run the following commands from the project root:
These commands must be executed via the command-line interface (CLI) within the project's root folder on your hosting server (often accessed via SSH). They perform crucial setup tasks:
· Composer install: Dependency Management. This command uses the PHP package manager (Composer) to read the project's dependency list (composer.json) and download all necessary third-party libraries and framework files (Laravel, database drivers, etc.).
· php artisan key:generate: Application Security. The key:generate command creates a unique, 32-character encryption key (APP_KEY) and inserts it into the .env file. This key is vital for encrypting user sessions, passwords, and other sensitive data, ensuring application security.
· php artisan migrate --seed: Database Setup. The migrate command creates all the necessary tables in the database (using the credentials from step 4). The optional --seed flag runs the initial seeders, which populate the newly created tables with essential starting data, such as default user accounts and possibly initial product categories.
5. Access the project in browser.
Once all previous steps are complete and successful, you can navigate to the application's URL in any web browser (e.g., http://yourdomain.com). The application should now display the login screen.
6. Admin Login Credentials:
This provides the default credentials created during the migrate --seed command that must be used to log in for the very first time. You must use these credentials immediately to access the administrative dashboard and change the default password for security purposes.
- Username: admin
- Password: admin@123
V. Admin / Configuration Guide
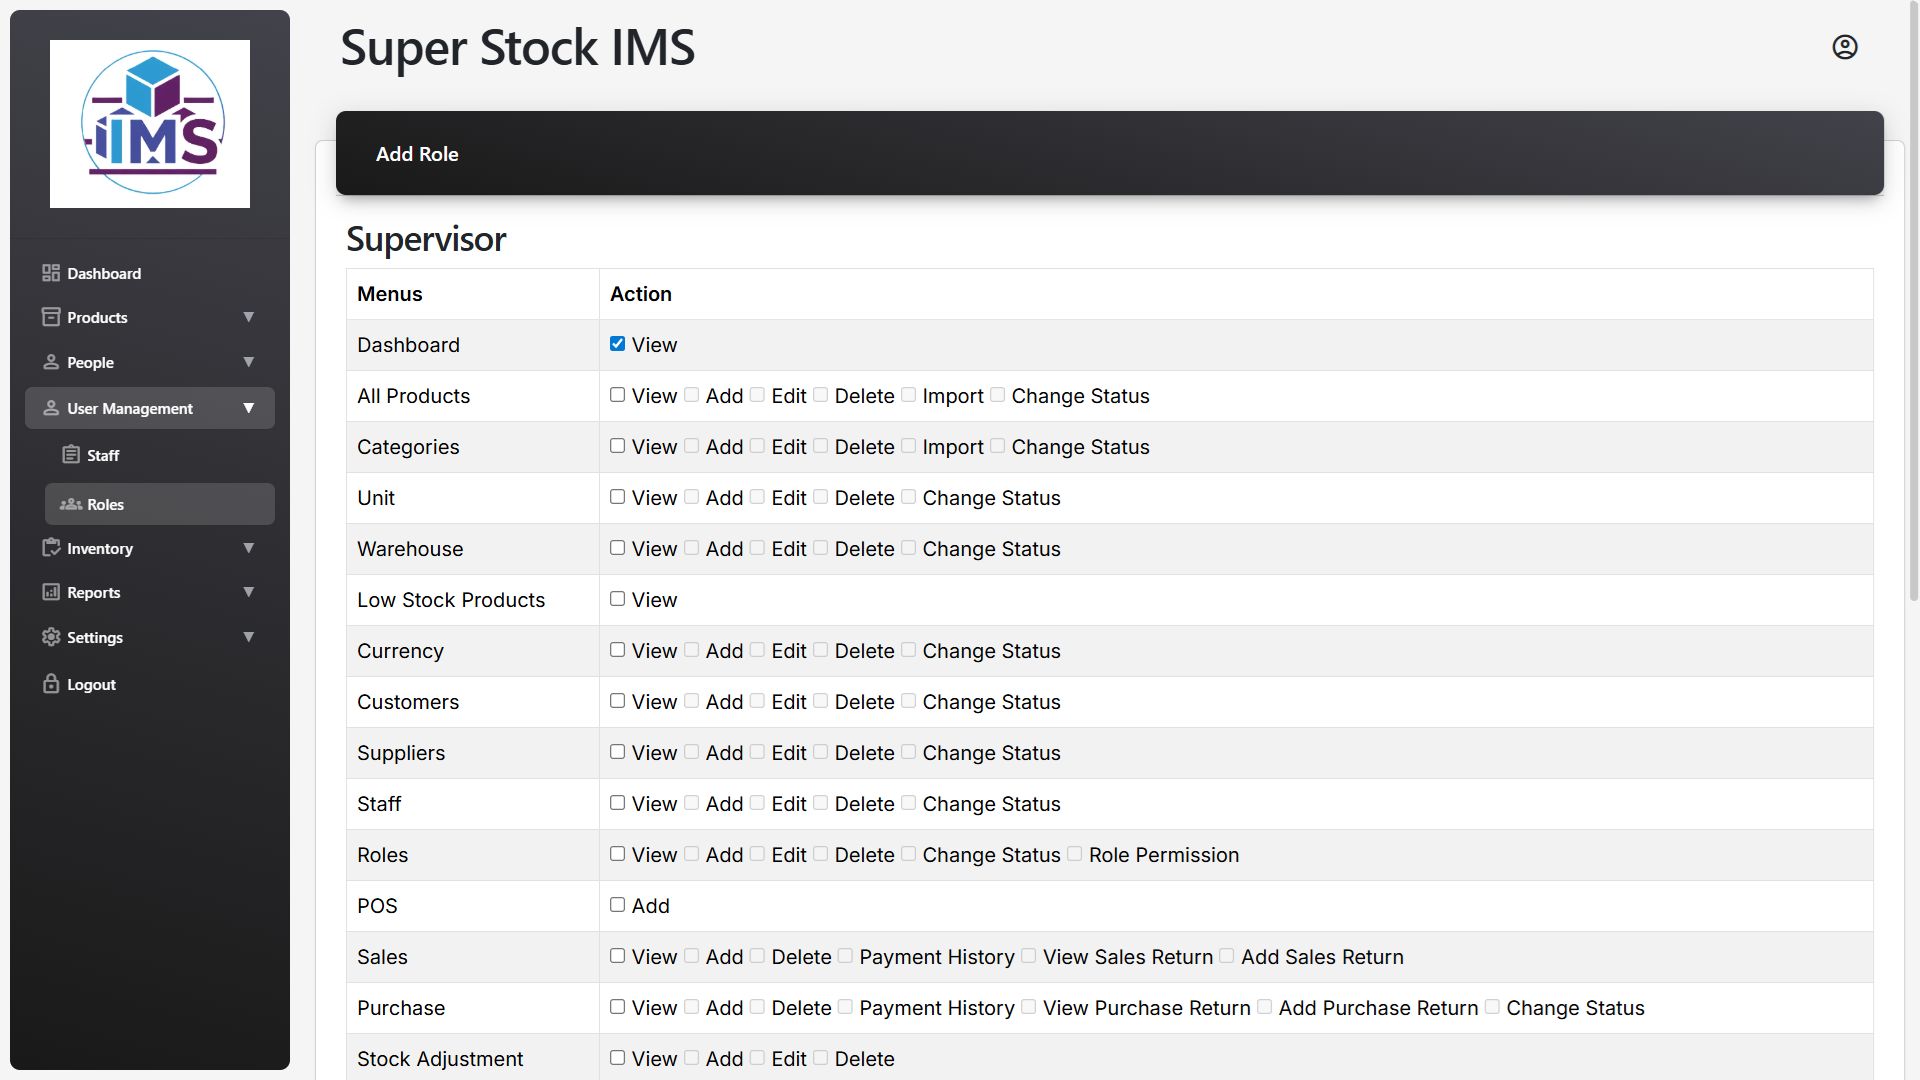
This allows an administrator to define precisely what actions a specific user role (e.g., "Sales Person," "Warehouse Staff") is permitted to perform across the entire Super Stock IMS.
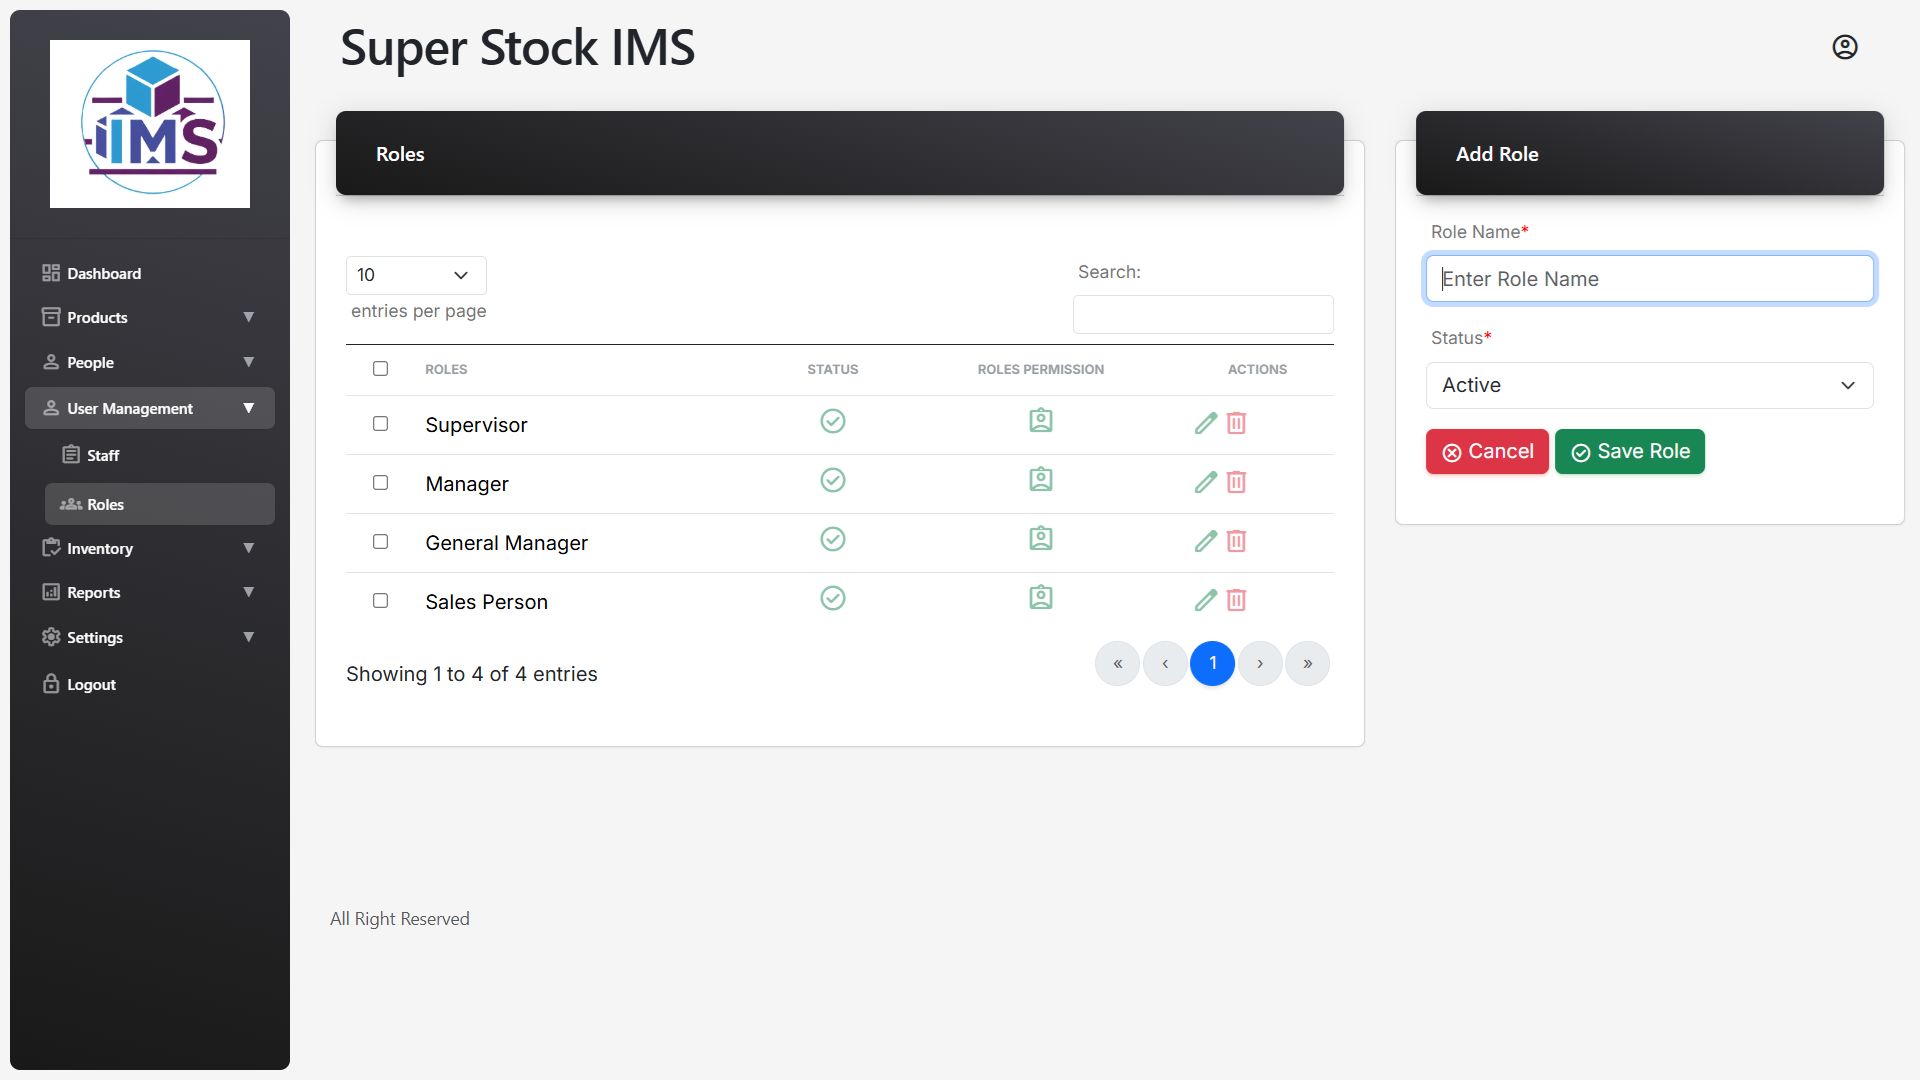
User Role Permission Configuration
The roles module lists every major module and sub-option in the system and provides granular control over user actions for each one:
· Modules and Sub-options: The left column lists every key area of the IMS, from high-level modules like Dashboard, Products, and Inventory, down to specific sub-options like All Products, Stock Adjustment, and Sales Report.
· Permission Types (CRUD & Status): For most transactional modules (like Products, People, and Inventory), the administrator can select permissions based on standard actions:
o View: Permission to see the data list or report.
o Add: Permission to create new records (e.g., a new product or a new sale).
o Edit: Permission to modify existing records.
o Delete: Permission to permanently remove records.
o Import: Permission to upload data in bulk (e.g., product lists).
o Change Status: Permission to alter the state of a record (e.g., marking a Purchase as received or a user as active).
Key Permissions
1. Dashboard/Reports: Access to all reports (Sales Report, Stock Report, Product Report, etc.) is controlled by a simple View permission, as these areas are read-only for analysis.
2. Product Management: For inventory master data (All Products, Categories, Unit, Warehouse), an admin can grant or deny the ability to View, Add, Edit, Delete, Import, and Change Status.
3. Sales/Purchase Transactions: Core operational modules like Sales and Purchase have specific permissions to include viewing Payment History, processing returns (View Sales Return / View Purchase Return), and adding new returns (Add Sales Return / Add Purchase Return). The POS is controlled by a simple Add permission (to create a POS transaction).
4. Administrative Settings: Critical system configuration areas like General Settings and SMTP Settings are controlled by a simple Add permission, which in this context means permission to access and modify those settings.
This screen is the foundation of the system's security, ensuring that, for instance, a "Sales Person" role might have permissions for View and Add Sales but lack permissions to Delete a Purchase or modify General Settings.
VI. User Manual
1. Sign In Page
The image displays the Sign in page, which serves as the security gateway for the Super Stock IMS application.
This page requires users to authenticate before gaining system access. It consists of three primary input fields:
1. Username: For entering the user's registered system username.
2. Password: For entering the corresponding secure password.
3. Remember Me: A toggle option to keep the user logged in across sessions, often by saving a cookie in the browser.
Once the credentials are provided, clicking the Sign in button grants access to the dashboard. A Forgot Password link is also available for users who need to initiate a password recovery process.
2. Dashboard
i) Accessing and Viewing the Dashboard
· Login: Access the Super Stock IMS application (via a web browser).
· Navigate to Dashboard: If not automatically displayed, click the Dashboard link in the left-hand sidebar navigation.
· Check Overview: Review the "Overview of your business performance" subtitle to confirm you are on the main dashboard screen.
· Initial Data Refresh: Locate and click the Refresh button (top-right corner) to ensure all data is current based on the system's latest transactions.
ii) Filtering and Customizing Data
Use the filter controls at the top of the dashboard to focus on specific periods or locations.
Step 1 – Select Warehouse: Click the dropdown menu labeled “All Warehouses”. Select a specific warehouse name (if applicable) or keep the default “All Warehouses” to view aggregated company data.
Step 2 – Set Start Date: Click the “From” date field (e.g., 01-10-2025). Use the calendar picker to select the desired start date for your analysis.
Step 3 – Set End Date: Click the “To” date field (e.g., 05-10-2025). Use the calendar picker to select the desired end date for your analysis.
Step 4 – Apply Filters: Click the “Apply Filter” button. The entire dashboard (KPI cards, charts and product lists) will instantly update to reflect data from the selected warehouse and date range.
iii) Interpreting Key Performance Indicators (KPIs)
Review the KPI cards at the top of the dashboard for an immediate performance check.
| KPI Card | How to Interpret | Actionable Insight |
| Total Sales | Total revenue generated from all sales transactions. | High value indicates strong sales performance. |
| Total Purchased | Total cost of inventory acquired during the period. | Use this to manage procurement budgets and supplier spending. |
| Profit | The calculated profit margin (Sales minus cost/purchases). | The primary indicator of financial success for the period. |
| Total Sales Return | The value of goods returned by customers. | A high value may signal product quality issues or customer service problems. |
| Total Purchased Return | The value of goods returned to suppliers. | Use this to assess supplier quality and identify faulty inventory received. |
iv) Analyzing Charts and Alerts
a) Sales & Purchase Analysis
· Sales vs. Purchase Chart: Compare the Sales line/area against the Purchase line/area.
Sales should generally track higher than Purchases (unless inventory build-up is intentional). Look for trends where purchases spike before sales trends rise (proactive stocking).
· Sales Return vs. Purchase Return Chart: Use this to analyze return volumes.
If Sales Return bar is significantly high, investigate customer feedback and product issues.
b) Product and Stock Alerts (Right Sidebar)
· Top Selling Products: Note the products listed here (e.g., TV Remote).
Ensure these popular items are always prioritized for reordering and sufficient stock is maintained.
· Low Stock Product: Immediately identifies products with stock warnings (e.g., 0 PIECE LEFT).
Click the “View All” button to go to the full Inventory/Report section and initiate a purchase order to prevent a stock out.
3. Side Navigation Bar
i) Dashboard:
Dashboard provides a high-level visual summary of the entire business performance, including key financial metrics, charts and alerts.
ii) Products Module:
The Products module is the core section for maintaining the master data for your entire inventory catalog. Clicking on the main “Products” dropdown reveals the detailed functions necessary for managing items, stock units and classifications.
A. All Products (Main Product List): This is likely the primary screen to view a complete list of every item currently tracked in the system. Users would come here to search, view details, edit existing products or add new items.
B. Categories (Product Grouping): This option allows you to manage the organizational structure of your inventory. You define groups (e.g., Electronics, Stationery, Accessories) to classify products, which helps with reporting and filtering (as seen in the “Low Stock Product” list on the right).
C. Unit (Measurement Management): It is used to define the units of measure for your products (e.g., Piece, Box, Unit, KG and Liter). This ensures accurate stock tracking and transaction recording.
D. Warehouse (Location Management): This section is used to define and manage the different physical storage locations where inventory is kept. This is critical for accurate stock control across multiple branches or storage sites.
E. Low Stock Products (Alert and Action List): ###/bb###
F. Currency Module:
The Currency Module is where you manage all the different types of money your business uses, especially if you deal with international suppliers or customers. This module is essential for setting up and maintaining accurate financial records in the Super Stock IMS.
The Currency module allows you to add and manage all the currencies your business transacts in, such as US Dollars, Euros, or Indian Rupees.
The most important function here is setting the Value for each currency. This value represents the current exchange rate, defining how much that currency is worth compared to your company's Default Currency (which is set by the Administrator in the main Settings module).
For example, if you set your Default Currency to US Dollars ($) and you add the Indian Rupee, the value you enter will be the exchange rate (e.g., 83) showing how many Rupees equal one Dollar.
By keeping these values updated, the system ensures that:
· All your sales, purchases, and reports are accurately converted back to your company's official default currency for consistent financial reporting.
· You can see the current status and quickly change the exchange rate whenever necessary.
In short, this module allows the system to correctly handle and report on money, regardless of the currency used in the transaction.
iii) People Module
The People module is the central hub for managing contact information and relationships with the two main groups of entities that interact with your inventory system; those are Customers and Suppliers.
A. Customers: This section is used to manage all details related to the people and companies who buy products from you. It typically includes contact information, sales history and possibly credit limits or loyalty status.
To view the Customer details, click on the view (eye) option in the Action column. The Customer details will be showed as a pop-up menu. We can edit and delete the Customer details.
B. Suppliers: This section is used to manage all details related to vendors and companies from whom you purchase goods (inventory). It typically includes contact information, purchase history and terms of payment.
To view the Supplier details, click on the view (eye) option in the Action column. The Supplier details will be showed as a pop-up menu. We can edit and delete the Supplier details.
iv) User Management
This module is an administrative tool used by managers or system administrators to control security and access within the Inventory Management System. It ensures that staffs only have access to the functions and data necessary for their roles.
A. Staff (Employee Account Management): This is the main section for viewing, adding, editing and managing individual staff accounts who need system access. As seen in the second screenshot, it includes fields to manage the staff member’s Name, Email, Role, Username, Password and Status (Active/Inactive).
To view the Staff details, click on the view (eye) option in the Action column. The Staff details will be showed as a pop-up menu. We can edit and delete the Staff details.
B. Roles (Permission Group Configuration): This section is used to define the specific access rights (permissions) for different job titles or groups within the company (e.g., Supervisor, Sales Person, and General Manager). You would configure what each role can view, create, edit, or delete across all system modules (Products, Sales, Purchases, Reports, etc.).
· Click on the Icon on the Roles and Permission column.
· The Roles and Permission page will be displayed.
v) Inventory Module:
The Inventory module is the operational center of the Super Stock IMS. It allows users to execute daily transactional activities that directly affect the quantity and location of physical stock within the warehouse(s).
A. POS (Point of Sale): It is used for quick, retail-style sales transactions. This interface is optimized for speed to process customer sales and immediately deduct stock quantities.
a) Product Selection: This area displays the inventory items as tiles including the product name, code, and price. Users can easily find an item using the "Search by product name or code" bar or by filtering the visible items using the "All Categories" dropdown.
b) Barcode Scanning Feature: The Cart section explicitly includes a "Scan with Camera" button/field. This is a critical feature that allows the user to use a connected barcode scanner or camera to read the product's barcode. Scanning the code automatically identifies the product and immediately adds it to the cart, significantly speeding up the transaction time compared to manual entry.
c) Cart and Checkout: This area builds the final order. The user must select the Customer and specify the Warehouse from where the stock will be pulled. For each item, the user can adjust the Quantity being purchased. Once the order is complete, the user confirms the final Total and processes the transaction using the ‘Pay Now’ button, which updates the sales record and deducts the inventory in real-time. The "Clear Cart" button is available to cancel the current transaction.
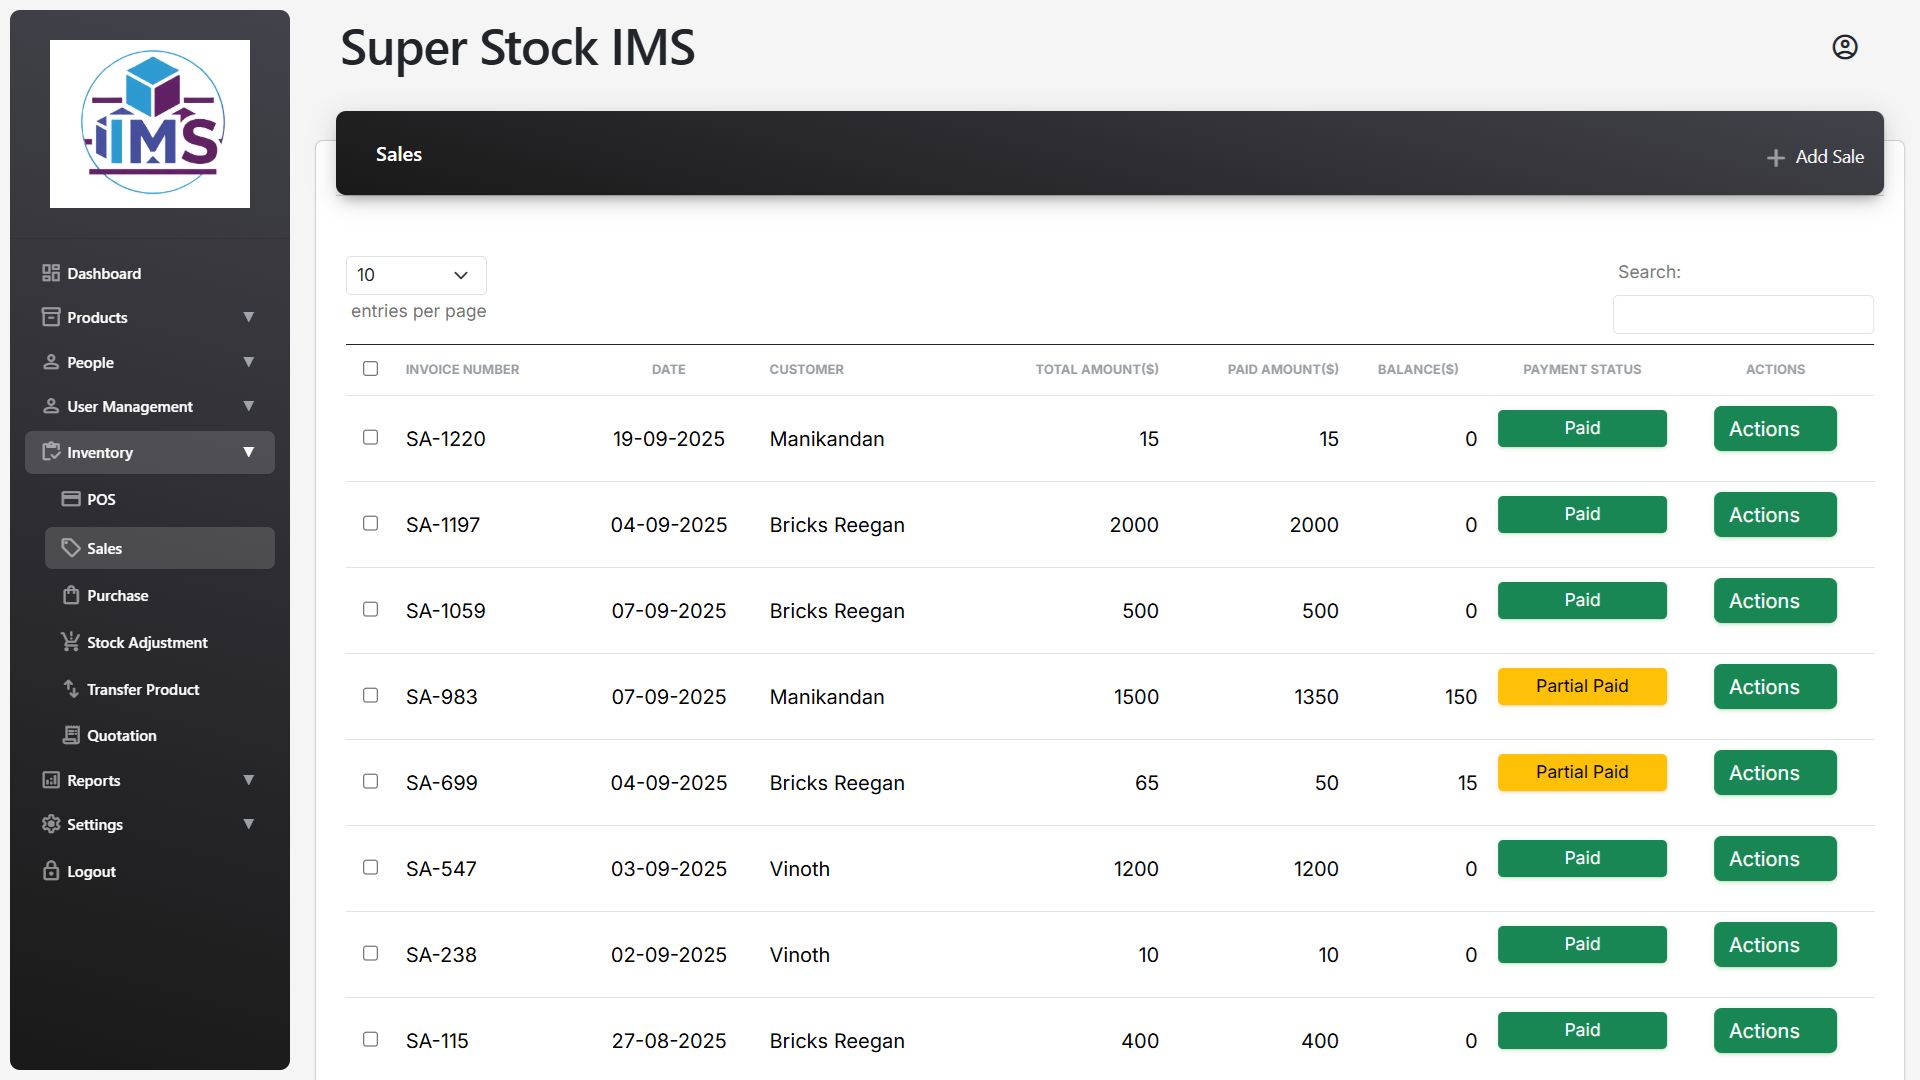
B. Sales:
###/bb###Invoice Number, the transaction Date, the corresponding Customer and the financial breakdown encompassing the Total Amount, Paid Amount, and remaining Balance.
The prominent green "Paid" status confirms the transaction's completion, while the "Actions" button provides quick access for detailed viewing or modifications of the invoice, and the "Add Sale" button at the top is the entry point for initiating new, formalized sales documentation.
Here is the explaining each sub-option under Actions in the Sales module:
Sub-option Function Purpose and Context View Transaction Inspection: Allows the user to open the sales invoice for detailed viewing. Used to review all line items, pricing, customer details, payment method, and any associated notes for the specific transaction without making changes. Edit Transaction Modification: Allows the user to change details of the existing sales record. Used to correct errors in quantity, pricing, customer selection, or date after the sale has been finalized. Note: Modifying a sale will affect inventory and financial reports. Payment History Financial Audit Trail: Displays a history of all payments made against this specific invoice. Used to reconcile partial payments, track payment dates, and verify that the full amount has been received. View Sales Return Return Status Check: Navigates to a list or details of any goods that have been returned by the customer for this specific sale. Used to see if the customer has already initiated or completed a return, linking the return record back to the original sale. Add Sales Return Initiate Return: Allows the user to create a new return record for this sales invoice. Used to start the process of recording customer returns, specifying which items are being returned and generating a refund or credit note. Delete Transaction Removal: Allows the user to permanently delete the sales invoice record from the system. This is a high-permission action used to remove erroneous or voided invoices. Note: Deleting a sale will reverse any stock deductions and financial reporting.
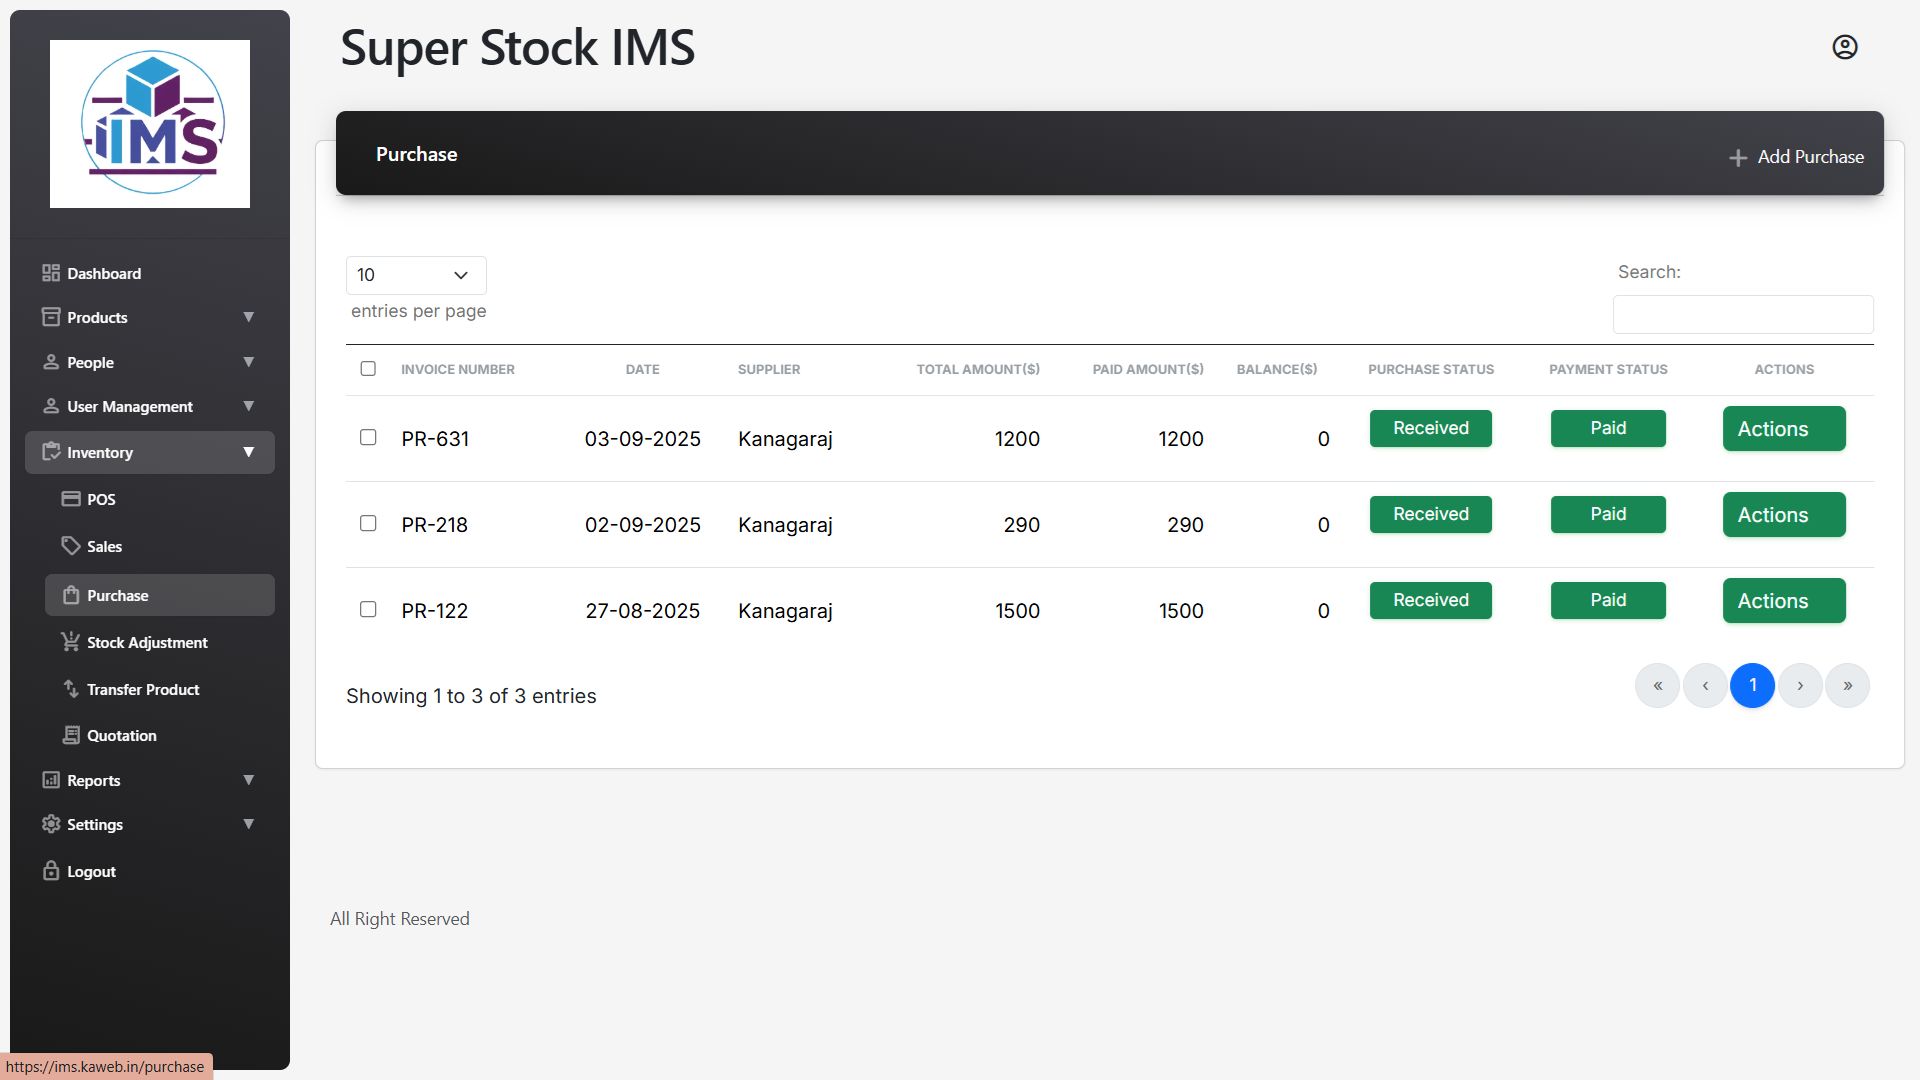
C. Purchase:
It is used for recording and managing the transactions where new inventory is acquired from suppliers. It is dedicated to overseeing all inbound stock transactions. This module presents a detailed, centralized ledger of purchase records, itemized by the unique Invoice Number, transaction Date, and the respective Supplier. The table transparently tracks the financial aspects, including the Total Amount, the Paid Amount, and the remaining Balance, which is zero for the visible entries. Crucially, it features two status indicators: Payment Status and Purchase Status, confirming that the inventory has been physically accepted.
The inclusion of an "Add Purchase" button at the top allows users to initiate a new procurement order, while the "Actions" button provides quick access for detailed viewing or necessary modifications to existing purchase records.
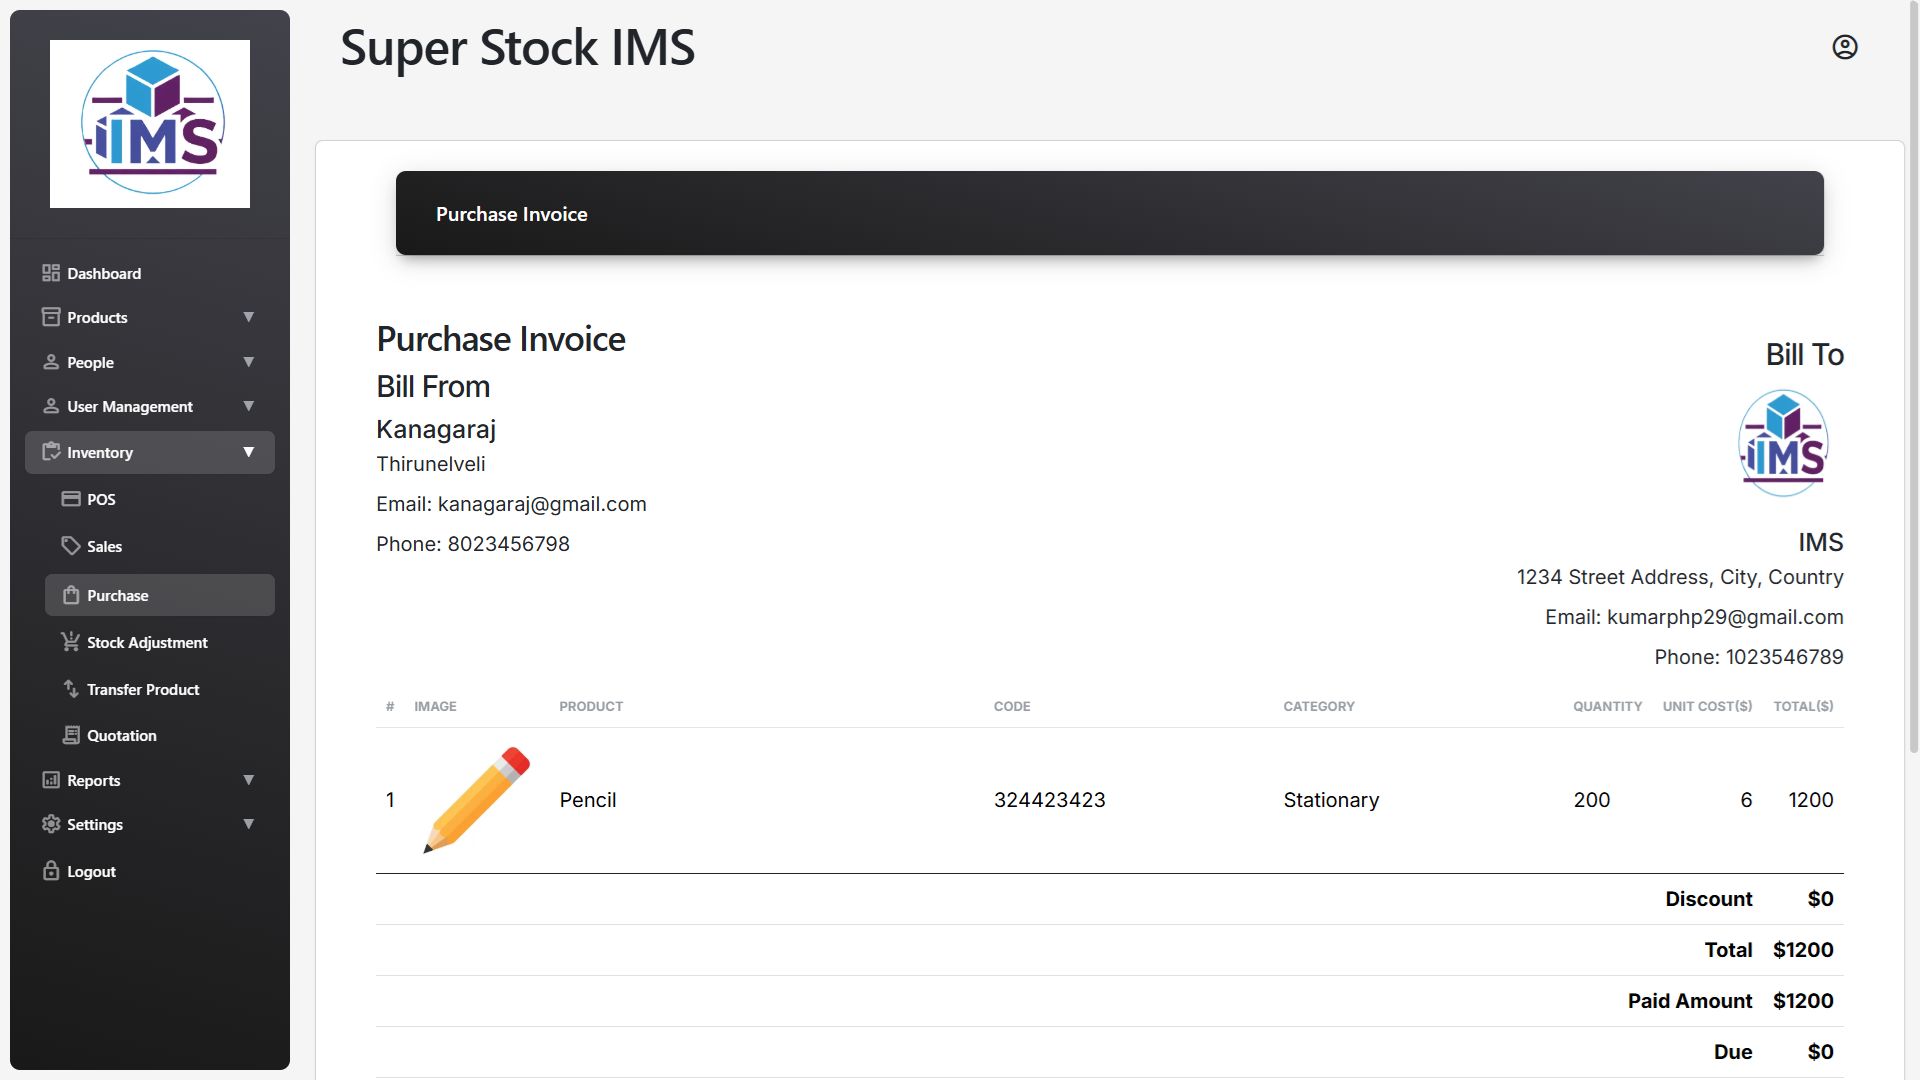
Here is the explaining each sub-option under Actions in the Purchase module:
Sub-option Function Purpose and Context View Transaction Inspection: Allows the user to open the purchase invoice for detailed viewing. Used to review all line items, negotiated prices, supplier details, and payment terms for the specific transaction without making changes. Edit Transaction Modification: Allows the user to change details of the existing purchase record. Used to correct errors in quantity received, pricing, supplier selection, or date after the purchase has been finalized. Note: Modifying a purchase will affect inventory counts and cost reporting. Payment History Financial Audit Trail: Displays a history of all payments made to the supplier against this specific invoice. Used to reconcile partial payments and verify that the full payment has been issued to the supplier. View Purchase Return Return Status Check: Navigates to a list or details of any goods that have been returned to the supplier for this specific purchase. Used to see if the business has already initiated or completed a return to the supplier, linking the return record back to the original purchase. Add Purchase Return Initiate Return: Allows the user to create a new return record against this purchase invoice. Used to start the process of recording returns to the supplier, specifying which items are faulty or incorrect and seeking credit or replacement. Delete Transaction Removal: Allows the user to permanently delete the purchase invoice record from the system. This is a high-permission action used to remove erroneous or voided invoices. Note: Deleting a purchase will reverse any stock additions and financial reporting.
D. Stock Adjustment (Inventory Correction): It used to manually correct stock levels for reasons other than sales or purchases (e.g., recording inventory write-offs due to damage, loss, or adding stock after a count).
Add Stock Adjustments:
By clicking the “Add Stock Adjustment”, we can add new stock adjustments.
E. Transfer Product: It is used to record the movement of inventory from one warehouse or stock location to another, ensuring accurate location tracking.
Add Stock Adjustments:
By clicking the “Add Transfer”, we can add new Product Transfer.
F. Quotation (Pre-sales Documentation): This option is used to create and manage price quotes or estimated for customers. While not a stock-affecting transaction, it is a key step in the sales process.
Add Quotation:
By clicking “Add Quotation”, the following page will be displayed and we can add new Quotations.
vi) Language Module
The Language module, located within the system's administrative section, is the dedicated control panel for managing the system's multilingual capabilities.
This page allows administrators to perform two core functions:
· View and Manage Existing Languages: A central table lists all supported languages (e.g., English, French, Spanish) by their full Name and short Code. Administrators can use the Export button to download the language's translation file for updates, or they can use the Edit and Delete actions to modify or remove existing language entries.
· Add New Languages: A form on the right-hand panel allows the system to be expanded with new languages. To add a language, the administrator must input the display Name and the corresponding standard Code, and critically, Choose File to upload the necessary language translation file (which contains all the translated text strings for the application interface).
This feature is essential for localizing the Super Stock IMS interface to support users operating in different language environments.
vii) Reports Module
The Reports module is the business intelligence center of the IMS, designed to generate deep, detailed, and structured data output beyond the summary provided on the main dashboard. These reports are essential for strategic analysis, financial reconciliation, and operational auditing.
a) Sales Report
Sales report provides a comprehensive breakdown of all sales over a specified period. Used for analyzing sales performance, revenue trends, and identifying top-performing sales staff or customers.
b) Purchase Reports
Purchase reports provide the details all procurement activities, including costs, volumes, and spending patterns with suppliers. Used for managing procurement budget and accessing supplier relationships.
c) Stock Report:
Stock Report presents a detailed view of current inventory levels, valuations, and stock movements. It is essential for calculating asset value and performing stock audits.
d) Product Report
Product report focuses on the performance of individual items or product categories, often including profitability per item or sales velocity.
e) Customer Report
Customer report provides insights into customer buying behavior, total spending, and sales history. Used for marketing, retention, and service efforts.
f) Supplier Report
Supplier report provides the details procurement history, spending totals and performance metrics related to specific vendors. Used for optimizing supply chain relationships.
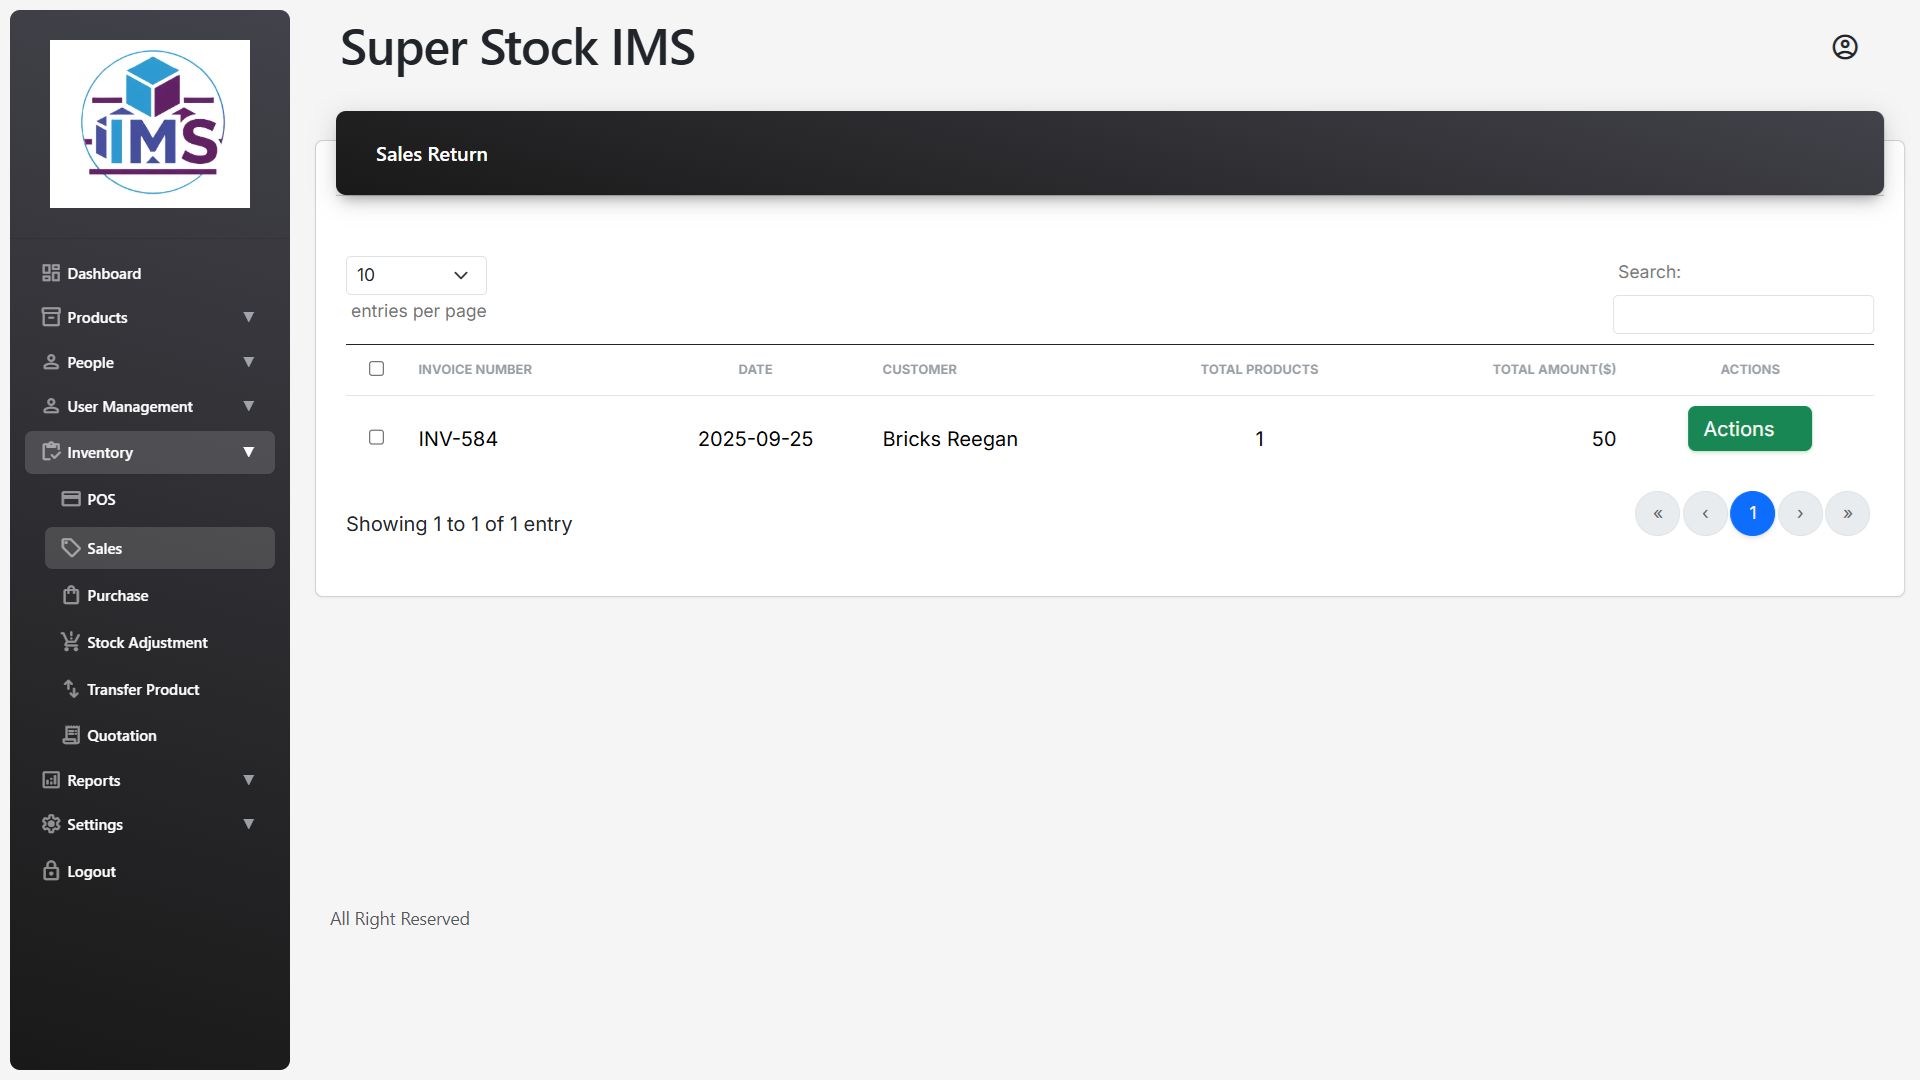
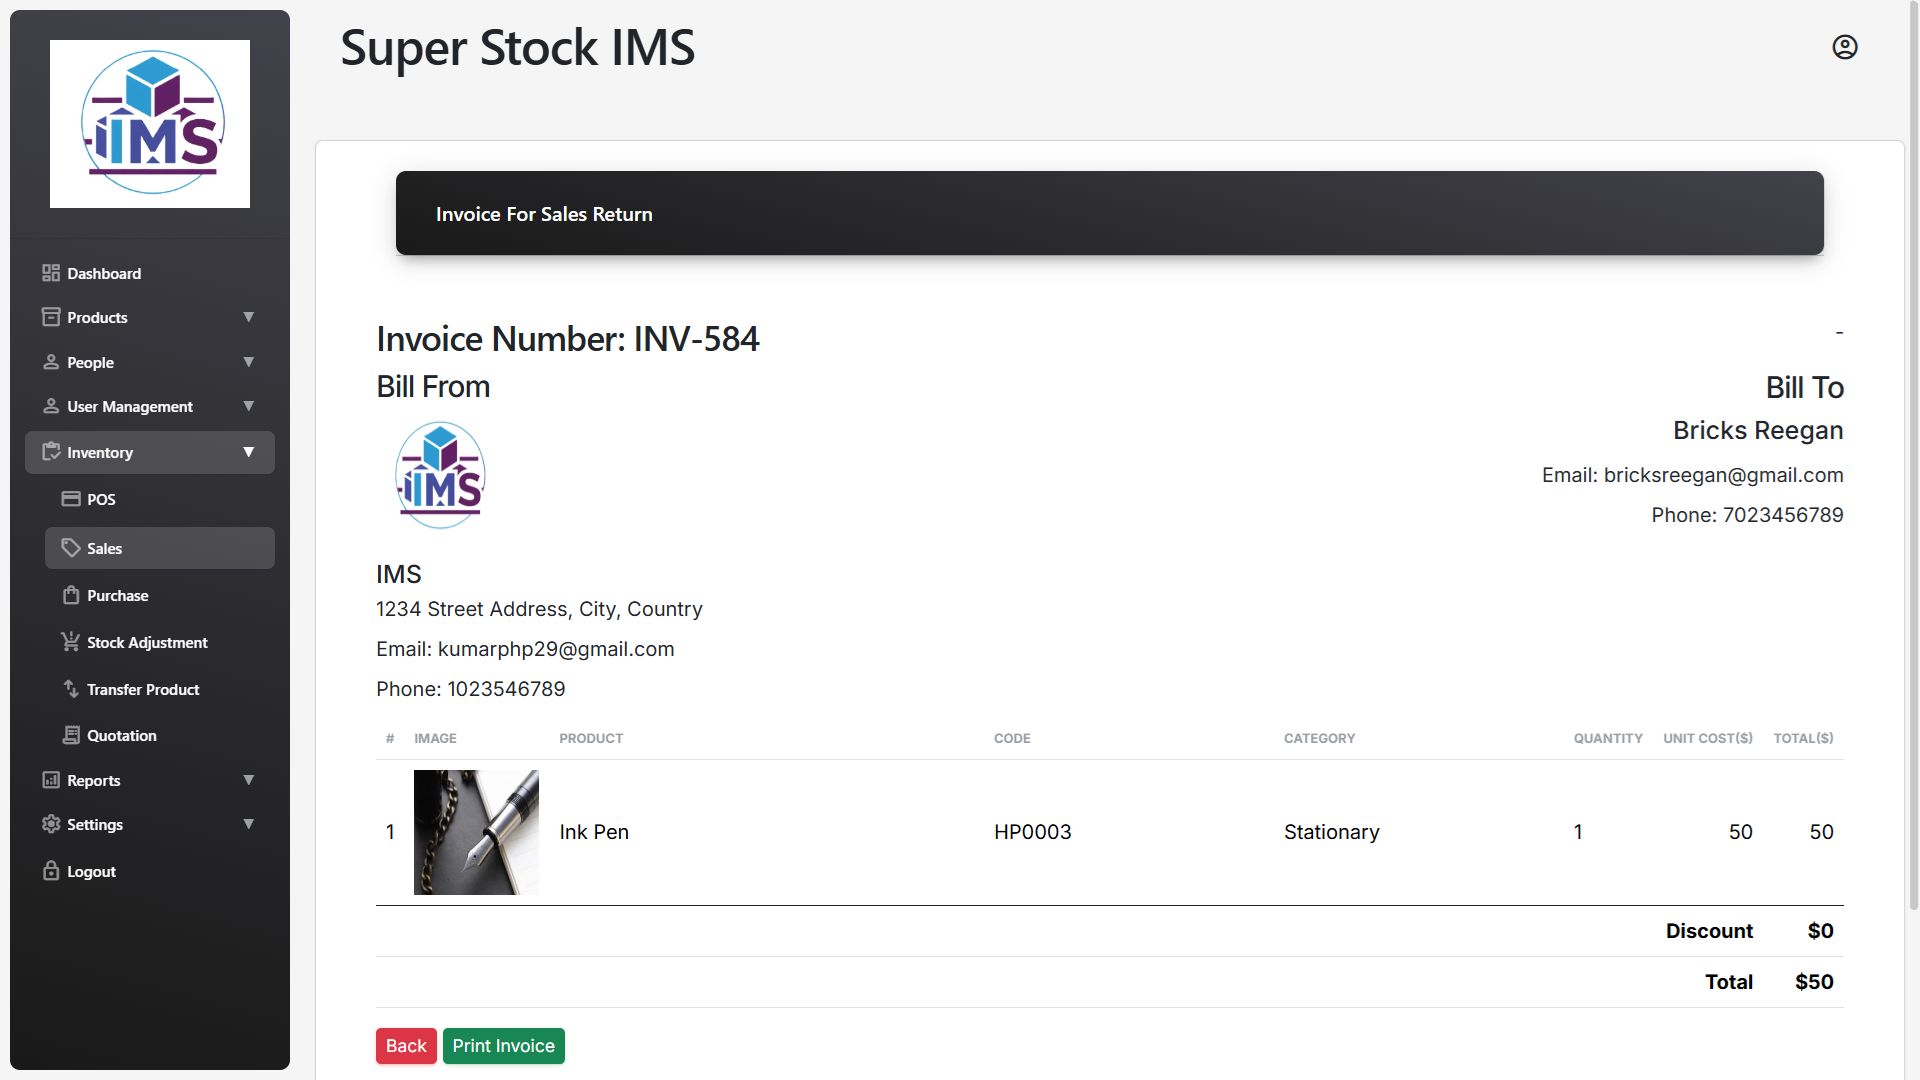
g) Sales Return Report
Sales return report provides specifically details all recorded instances of stock being returned by customers. It’s important for tracking product quality issues and managing refund liabilities.
h) Purchase Return Report
Purchase return report provides the details all instances of stock being returned to suppliers. It’s important for monitoring supplier quality and ensuring proper credit or replacement.
viii) Settings Module
The Settings module, visible in the side navigation bar, is the administrative control center of the Super Stock IMS, designed for configuring system-wide parameters and operational defaults. It is the administrative control center of the Super Stock IMS, designed for configuring system-wide parameters and operational defaults.
a) General Settings (Core System Configuration)
###/bb###Site Title (Super Stock IMS), Company Name (IMS), Phone, Address, Default Currency ($), company Logo, and email configuration (From Email). It also includes fields for web presence optimization like Meta Title and Meta Description.
b) SMTP Settings (Email Configuration)
This is used to configure the Simple Mail Transfer Protocol (SMTP) details necessary for the system to send outgoing emails. This is critical for automated functions for password reset links.
In summary, the Settings module ensures the IMS is properly branded, legally compliant (via address/details), and fully functional for external communications (via SMTP), providing the necessary tools for system-level configuration.
ix) Logout
The Logout option, located at the bottom of the side navigation bar, is a security function that allows the user to securely exit the Super Stock IMS application. Clicking it ends the current user session to protect sensitive business data from unauthorized access.
x) User Icon
The topmost icon typically refers to the profile or user-specific menu accessible from the top-right corner of the application interface, usually indicated by a user icon.
· Profile: The Profile option allows the currently logged-in user to access and view their personal account information. This is used to review and potentially update personal details associated with the user's system account.
· Change Password: The Change Password option provides a dedicated interface for the user to securely update or reset their login password. This is an essential security feature used to maintain the integrity of the user's account and prevent unauthorized access.
· Logout: The Logout option serves as the session termination control, allowing the user to securely end the current session and log out of the Super Stock IMS application. This ensures that sensitive business data is protected when the user steps away from the device or is finished working.
· Demo URL: https://ims.kaweb.in/
· User name: demodemo
· Password: demo@123
·
· Contact: [email protected]
Features
Key features of Super Stock IMS:
- Dashboard
- Manage Products
- Manage Categories
- Manage Unit
- Manage Multiple Warehouse
- List Low Stock Product
- Manage Multiple Currencies
- Manage Customers
- Manage Suppliers
- Manage Staff
- Manage Roles
- Roles and Permission
- Sales
- Purchase
- Stock Adjustment
- Transfer Product
- Quotation
- Manage Multiple Languages
- Report
- Sales Report
- Purchase Report
- Stock Report
- Product Report
- Customer Report
- Supplier Report
- Sales Return Report
- Purchase Return Report
Requirements
- PHP 8.2 or higher
- MySQL 5.7 or MariaDB 10.2+
- Composer 2.5 or higher
- Apache / Nginx server with mod_rewrite enabled
- PHP extensions: OpenSSL, PDO, Mbstring,Tokenizer, XML, Ctype, JSON, BCMath, Fileinfo - Basic Laravel installation knowledge
Instructions
1. Unzip the downloaded package.
2. Upload all project files to your hosting directory.
3. Rename `.env.example` to `.env`
4. Open the `.env` file and update your database credentials:
DB_DATABASE=your_database_name
DB_USERNAME=your_db_user
DB_PASSWORD=your_db_password
5. Open terminal and run the following commands from the project root:
composer install
php artisan key:generate
php artisan migrate --seed
6. Set the folder permissions (if needed) for `storage` and `bootstrap/cache`
7. Access the project in browser.
🔐 *Admin Login Credentials:
Username: admin
Password: admin@123
Reviews
-
8 months ago
 HelloRam PurchasedRating:
This is really a simple yet powerful Inventory Management System (IMS) with POS, barcode scan and multiple warehouse built with Laravel 12. What matters is the author's attitude towards buyer's requests. This is an author who is very positive. Regarding code structure, I did not get time to analyze. As such I am satisfied. Two updates of code already done by the author
HelloRam PurchasedRating:
This is really a simple yet powerful Inventory Management System (IMS) with POS, barcode scan and multiple warehouse built with Laravel 12. What matters is the author's attitude towards buyer's requests. This is an author who is very positive. Regarding code structure, I did not get time to analyze. As such I am satisfied. Two updates of code already done by the author
|
PHP Script Installation Service
Don't worry about the installation of your script! Have your PHP Script installed for you.
|
$29 | Buy now |
| Category | Scripts & Code / PHP Scripts / Management / Inventory |
| First release | 11 September 2025 |
| Last update | 16 February 2026 |
| HTML/CSS Framework | Bootstrap |
| Software version | PHP 8.2, PHP 8.3, PHP 8.4 |
| Files included | .php, .css |
| Database | MySQL 5.x |
| Software framework | Laravel |
| Tags | inventory, POS, warehouse, sales management, inventory management system, stock management system, warehouse management, product management, purchase management, stock manager, ims, laravel inventory system, barcode scan, php inventory system |